Add, Edit, Delete & View Invoices
This guide provides an overview of how to manage invoices. It covers adding, editing, deleting, and viewing invoices in the Billing application.
Navigate to Invoices in the Billing Application
- Select 'Invoices' from the Sidebar, under Billing.
- This opens the 'Invoices' page.
How to View an Invoice
- In the Invoices page, you will see a list of all invoices.
- Click on an invoice to view its details.
- The invoice details page will display all relevant information about the selected invoice, including a table of all items.
How to Create an Invoice
-
Start Invoice Creation
- In the Invoices listing page, click on the 'Create Invoice' button at the top right corner.
-
Select Customer
- A modal will appear for selecting the Customer for the invoice.
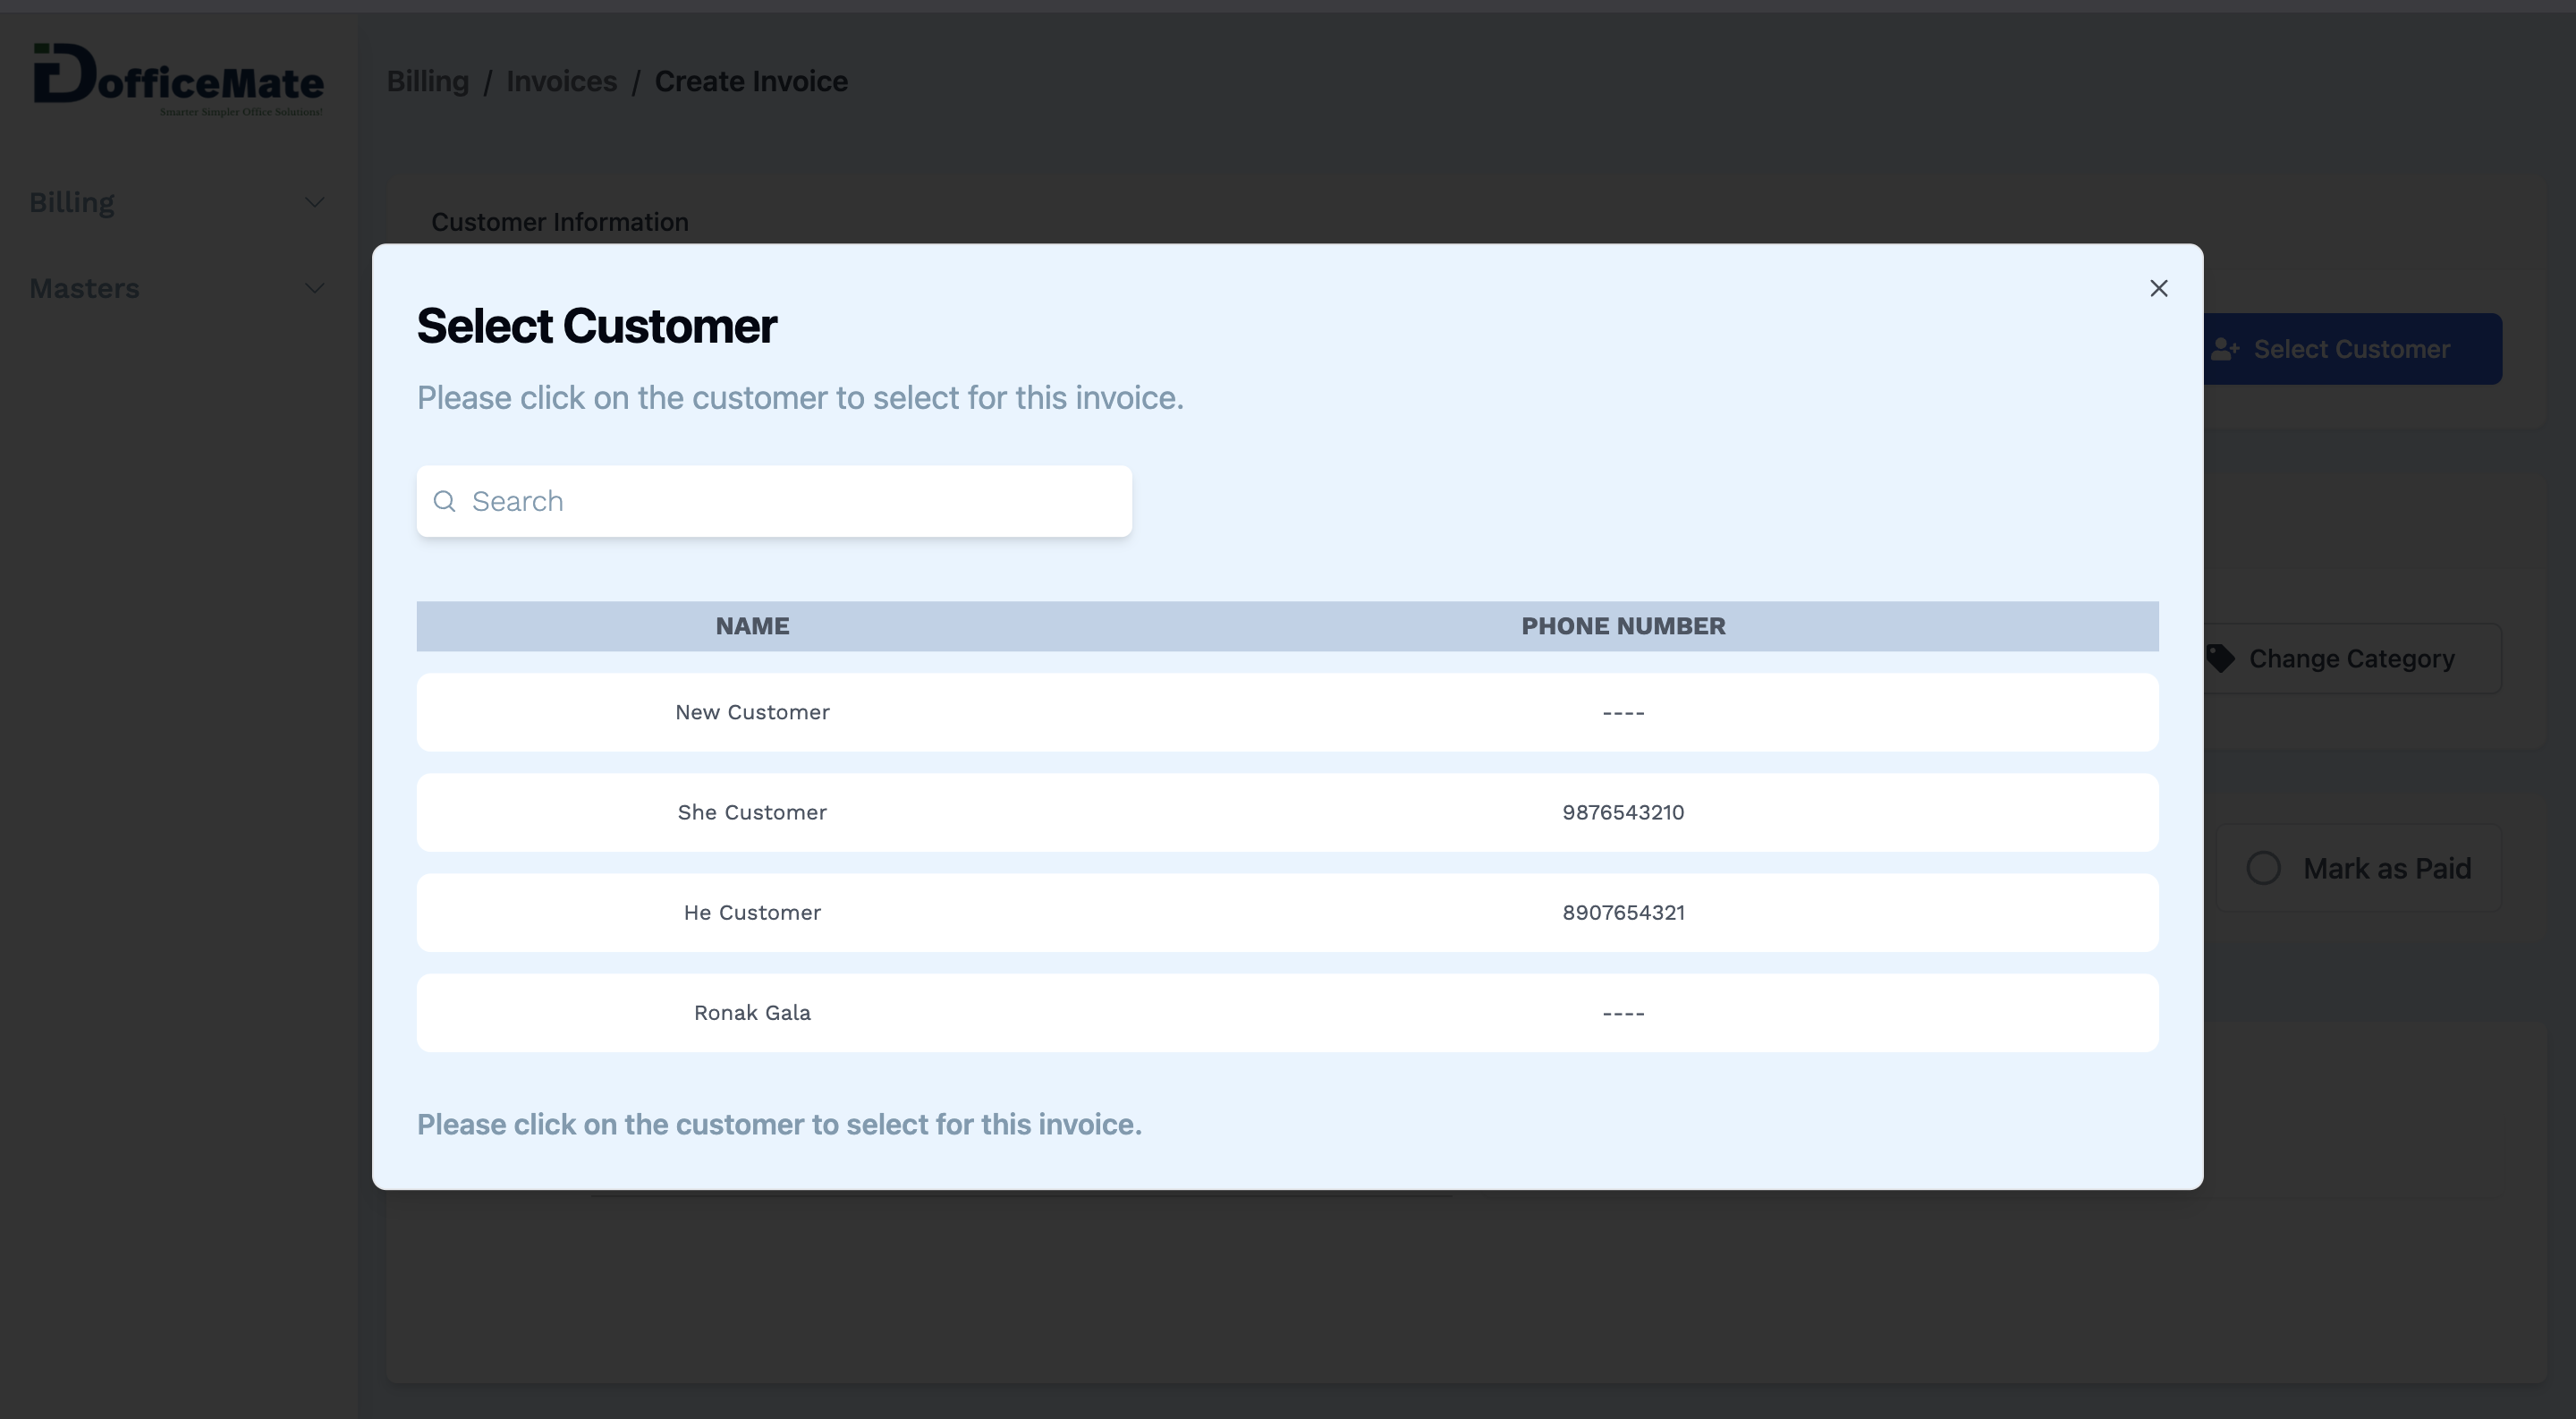
- Click on a Customer from the list to select them.
- You can change the selected customer at any time before saving the invoice by clicking on the Change Customer button.
-
Choose Category
- Select a Category for the invoice.
- If you have set a default Category, it will be pre-selected and marked as default.
- To select a different Category, click on the Change Category button.
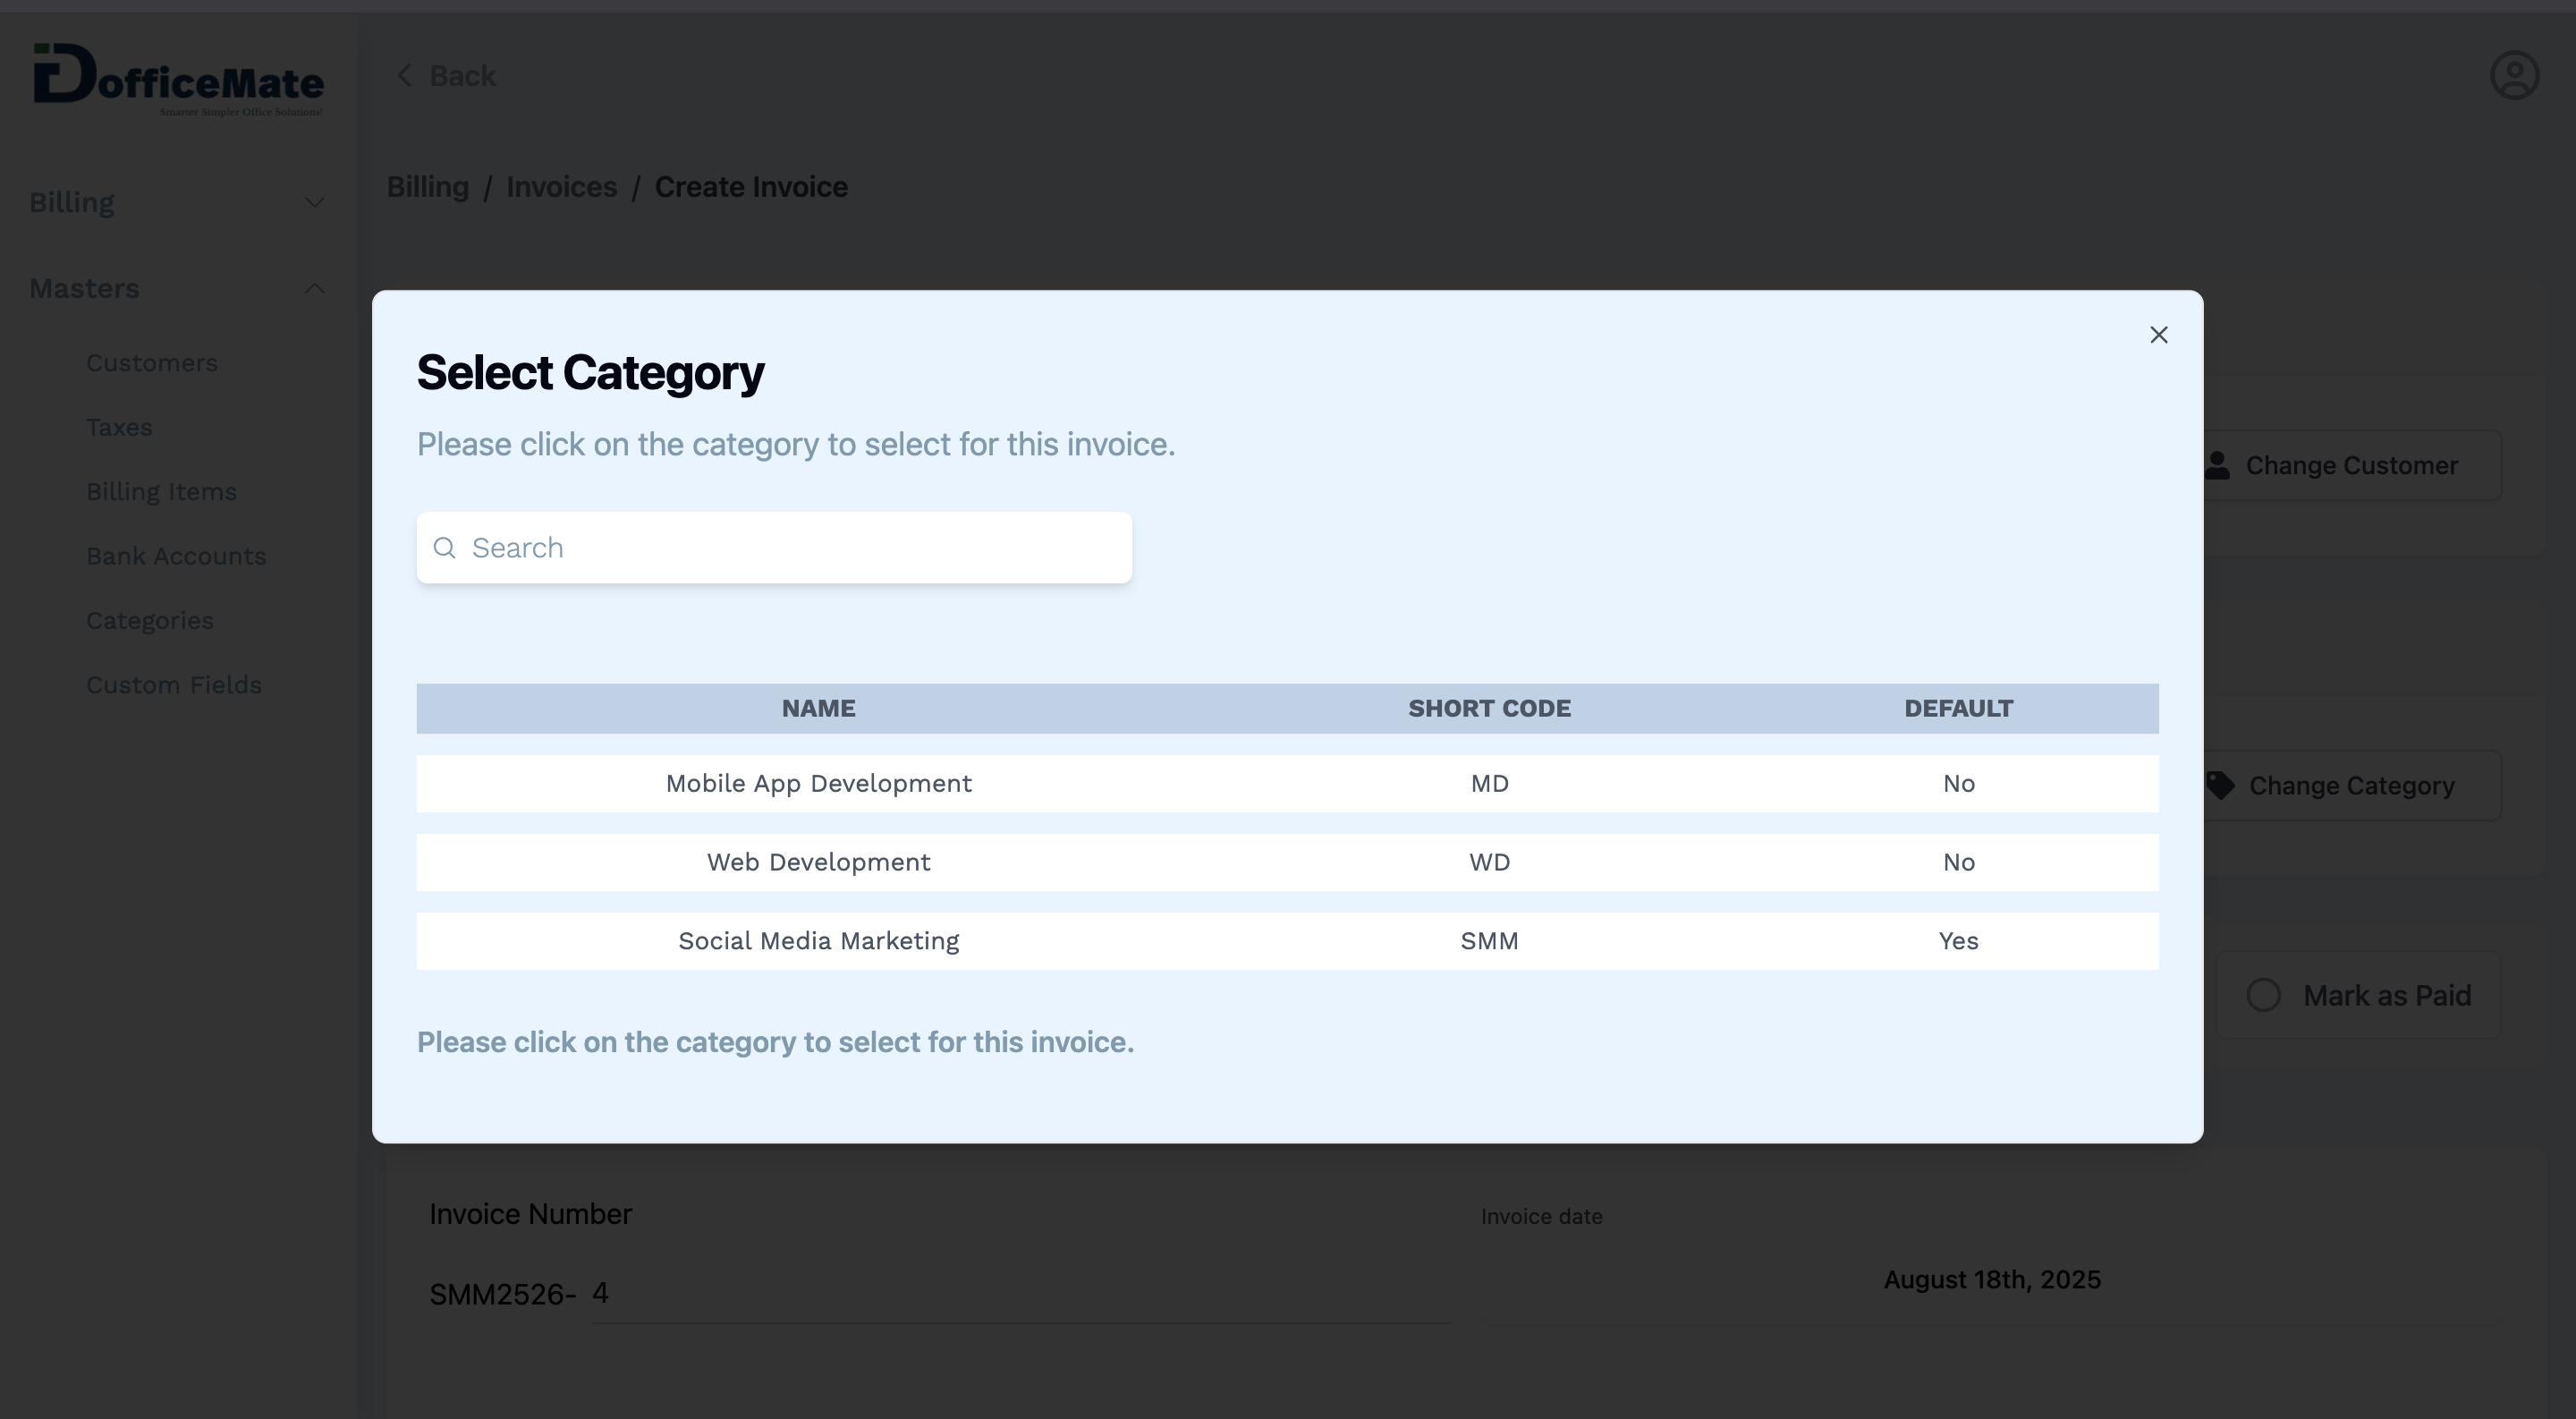
- Select a Category for the invoice.
-
Mark Invoice as Paid (Optional)
- Click on the Mark as Paid button on the right side if you wish to mark the invoice as paid.
-
Set Invoice Number
- Enter the Invoice Number in the input field.
- This may be pre-filled with a generated prefix and number, based on the selected category.
- Note: You cannot change the Invoice Prefix here, but you may manually edit the Invoice Number.

- Enter the Invoice Number in the input field.
-
Select Invoice Date
- Choose the Invoice Date. By default, the current date will be selected.
-
Fill in Custom Fields
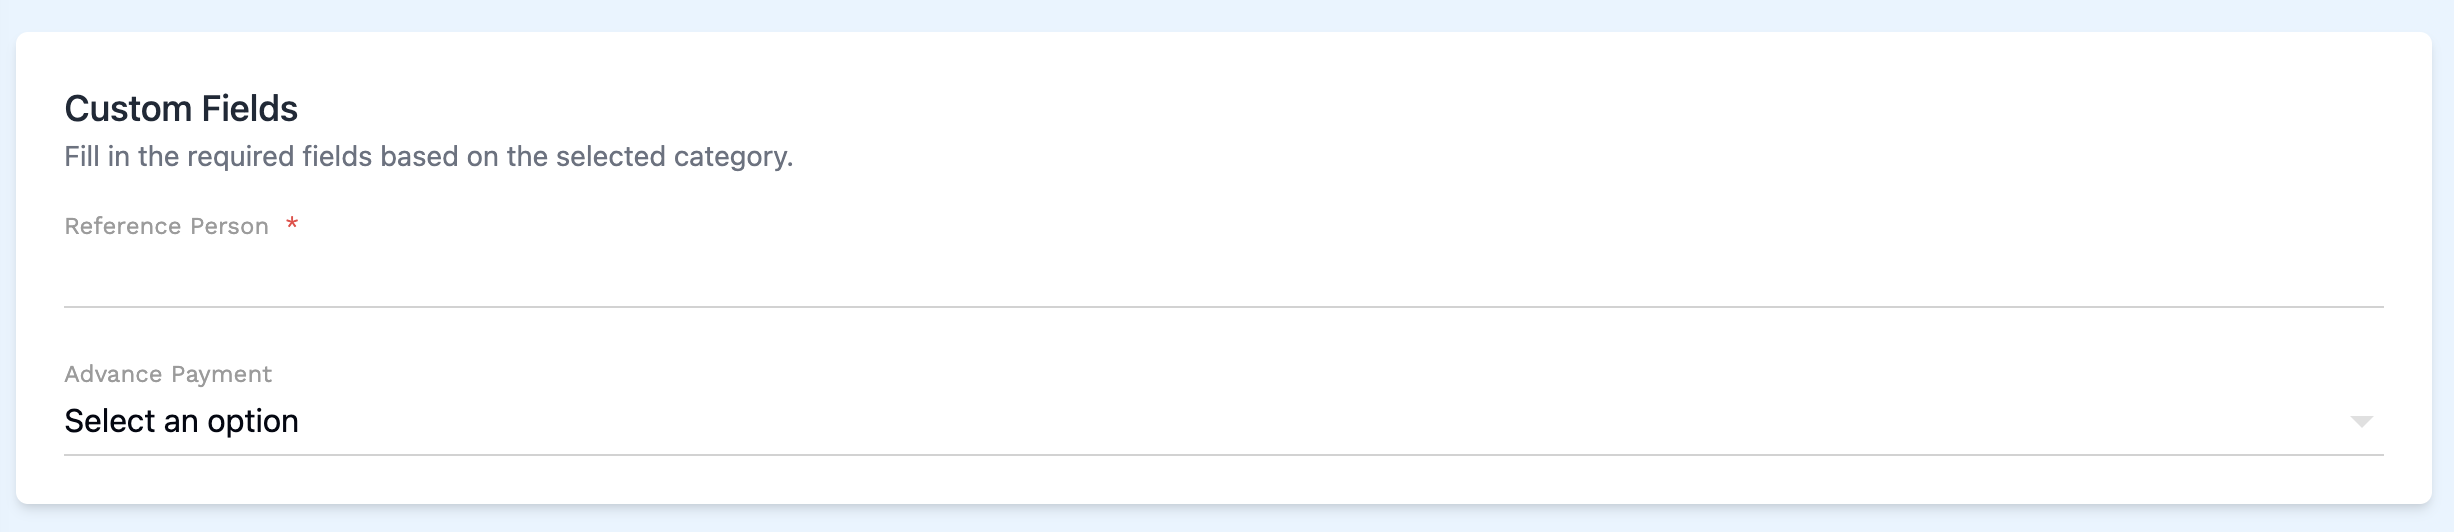
- Custom fields may be available in the invoice creation form based on the selected Category.
- Required custom fields will be marked with an asterisk (*). These fields must be filled out before the invoice can be saved.
-
Create the Invoice Table
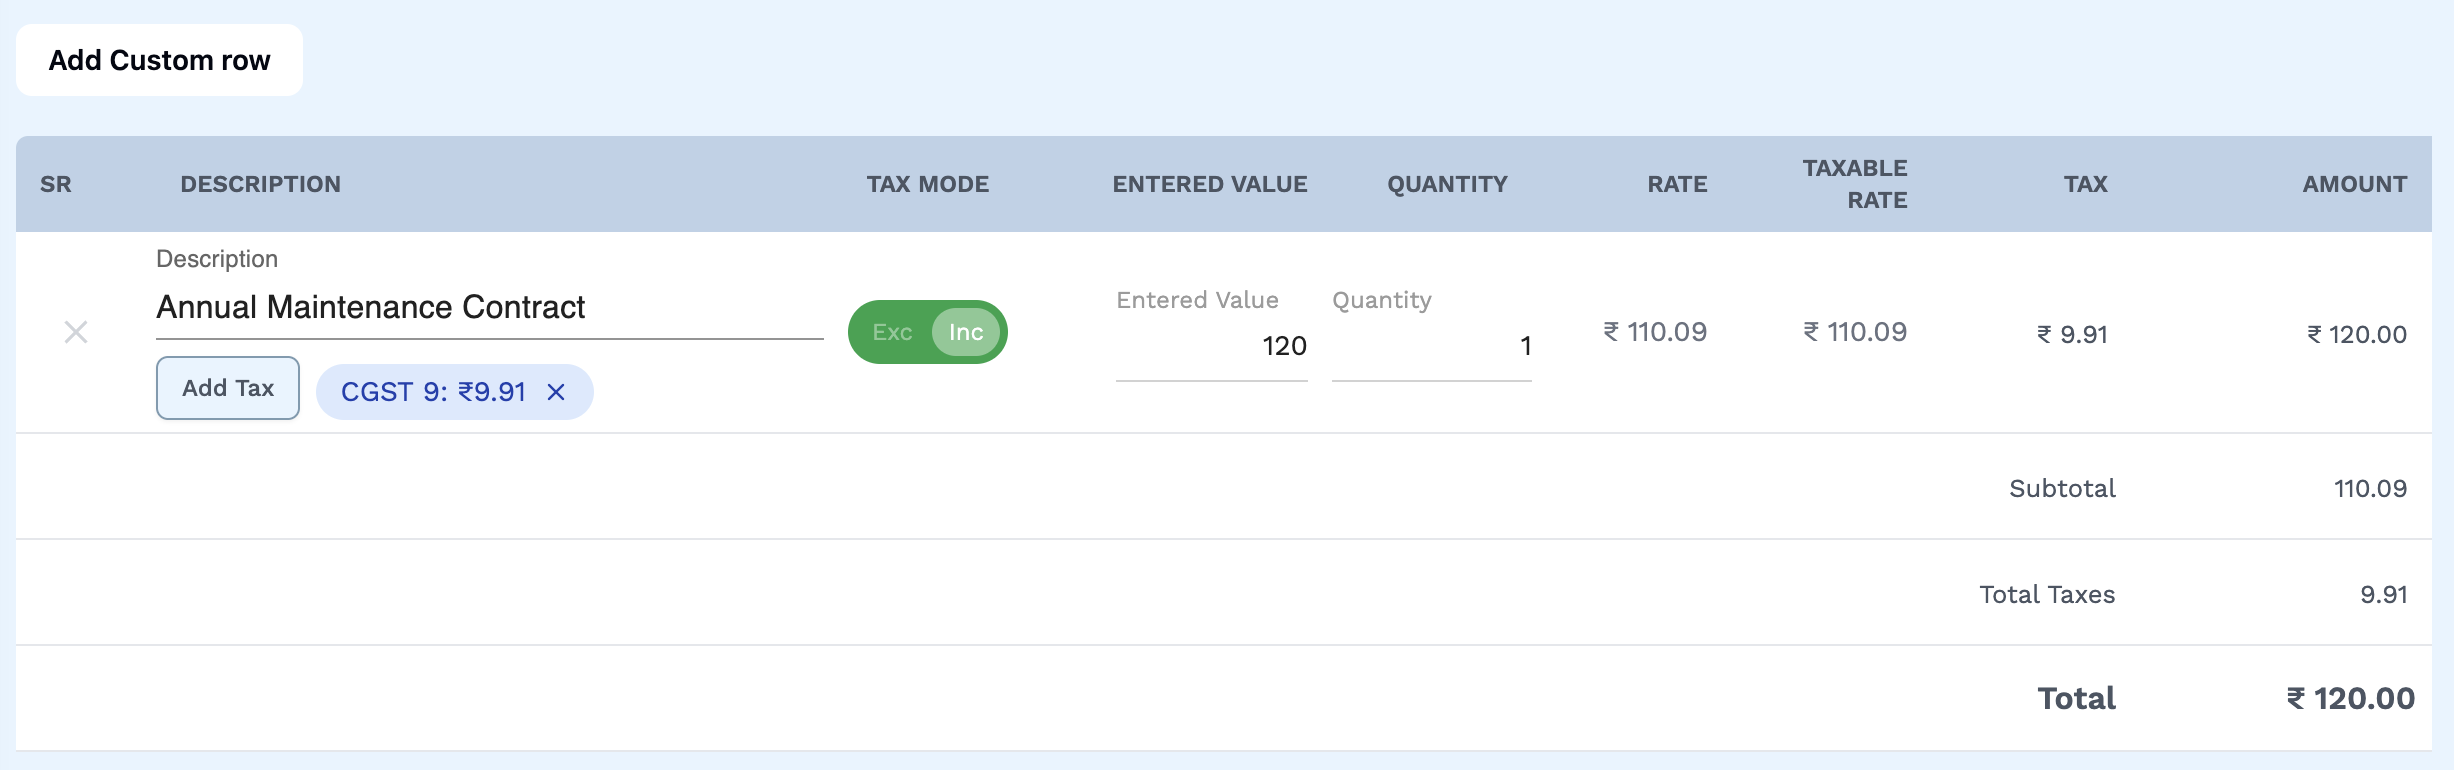
- Click on Add Custom Row button to add a new row to the invoice table.
- Each row will allow you to enter details for a specific item or service being invoiced.
- Fill in the required fields for each item, such as Description, Entered Value and Quantity.
- Typing in the Description field will show suggestions based on Billing Items that have been previously created.
- Click on a suggestion to auto-fill the Description field.
- Alternatively, you can manually enter a description if the suggestions do not fit your needs.
- Under the Description field, you will see an Add Tax button. Clicking on Add Tax will show you all the available tax options.
- You may select multiple tax options if needed.
- You can change the tax mode applied to each item by clicking on the Toggle button under the Tax Mode column.
- The two tax modes available are Inclusive and Exclusive.
- Inclusive means the tax is included in the item price, while Exclusive means the tax is added on top of the item price.
- You can only apply a tax mode if you've added a Tax for the item.
- In the Entered Value field, enter the value for the item being invoiced.
- This is the value on which the tax will be calculated.
- In the Quantity field, enter the quantity of the item being invoiced.
- The Rate, Taxable Rate, Tax and Amount will be automatically calculated based on the entered values and selected tax options.
-
Attach Files (Optional)
- If you need to attach any files to the invoice, you can do so by clicking on the Attach Files button.
- This will open a file picker dialog, allowing you to select files from your device.
- Once selected, the files will be uploaded and attached to the invoice.
-
Review and Submit Invoice
- Before submitting the invoice, review all the details to ensure accuracy.
- Once you are satisfied with the invoice, click on the Save button to save the invoice.
How to Edit an Existing Invoice
-
Navigate to the Invoices Update Page
- In the Invoices listing page, click on an invoice to open the Invoice Details page.
- Click on the Edit button, located at the top right corner of the page.
- This opens the page to edit the invoice details.
-
Follow the Invoice Creation Steps
- Follow the same steps as you would when creating a new invoice.
- Make the necessary changes to the invoice details.
-
Save Your Changes
- Once you have made the necessary changes, click on the Save button to update the invoice.
How to Delete an Existing Invoice
- Navigate to the Invoices Listing page
- Select 'Invoices' from the Sidebar, under Billing.
- This opens the 'Invoices' page.
- Select the Invoice to Delete
- Click the 3 dots icon next to the invoice you want to delete.
- From the dropdown menu, select Delete.
- Confirm Deletion
- A confirmation dialog will appear asking you to confirm the deletion.
- Click Confirm to delete the invoice.
How to Download an Invoice PDF
- Navigate to the Invoices Details page
- In the Invoices listing page, click on an invoice to open the Invoice Details page.
- Download the Invoice PDF
- In the Invoice Details page, click on the Download button, located at the top right corner.